It is well known that we can make a cardioid by drawing straight lines inside a circle. Simply choose one point on the circle’s boundary to be the base point. Then, connect points on the circle to the points twice as far away from the base point (measured along the circumference). If there are n equally-spaced points around the circle, we can number them consecutively and join point k to 2k modulo n. The envelope of all such lines forms the cardioid. One can perform this construction with a pencil and ruler or with string running between the points on the circle.
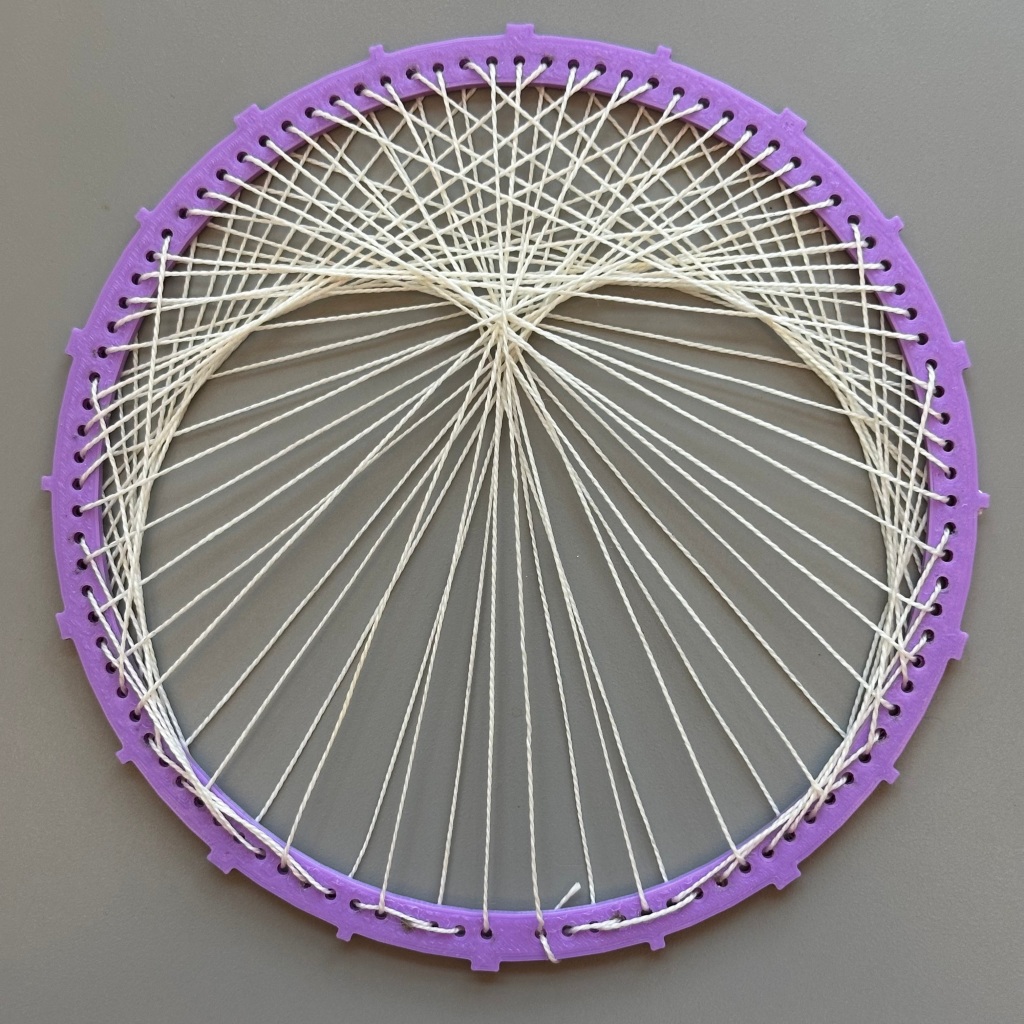
In this blog post, we show that we can also construct a cardioid by folding paper!
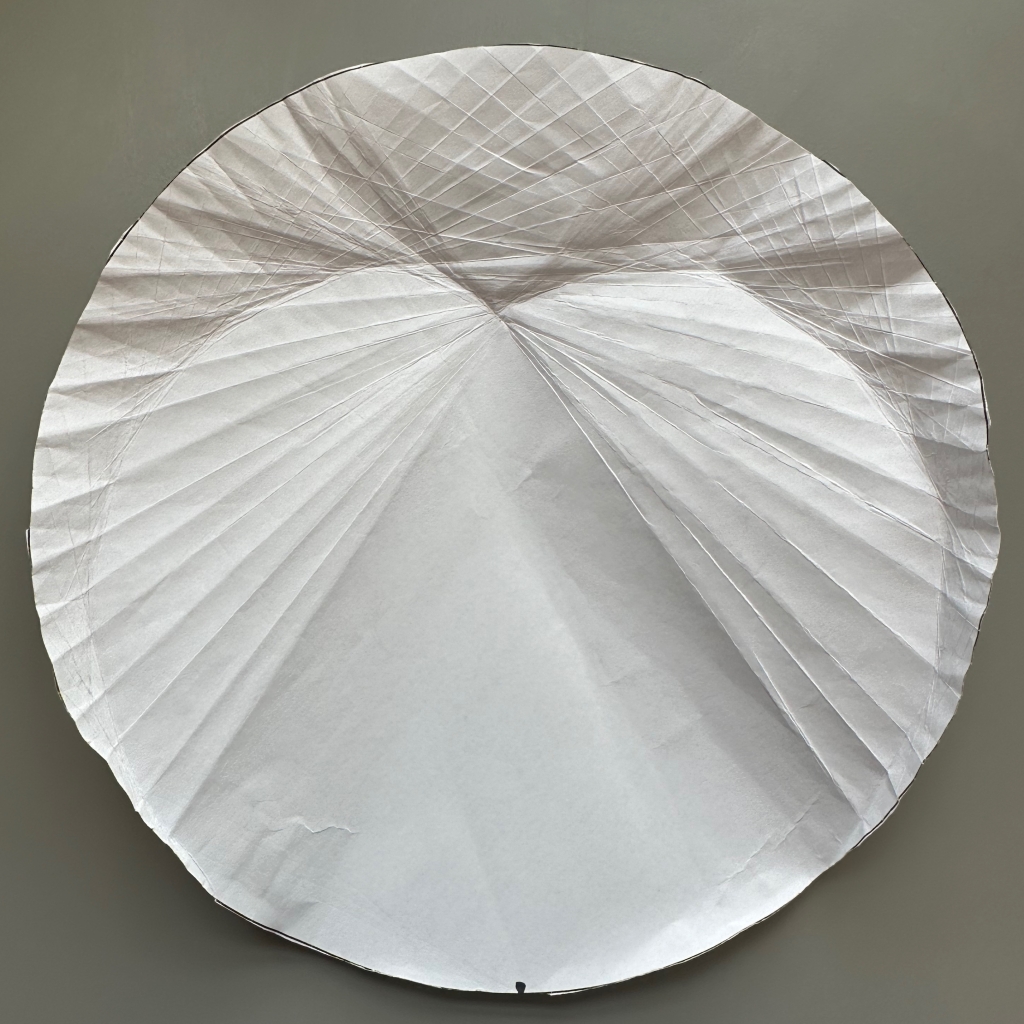
Begin with a circular piece of paper. Wax paper works especially well because the fold lines are easy to see. Mark one point on the circle as the base point; call it B. Imagine, as in the figure below, that some diameter PQ is drawn across the circle and the arcs BP and BQ have lengths x and y, respectively.
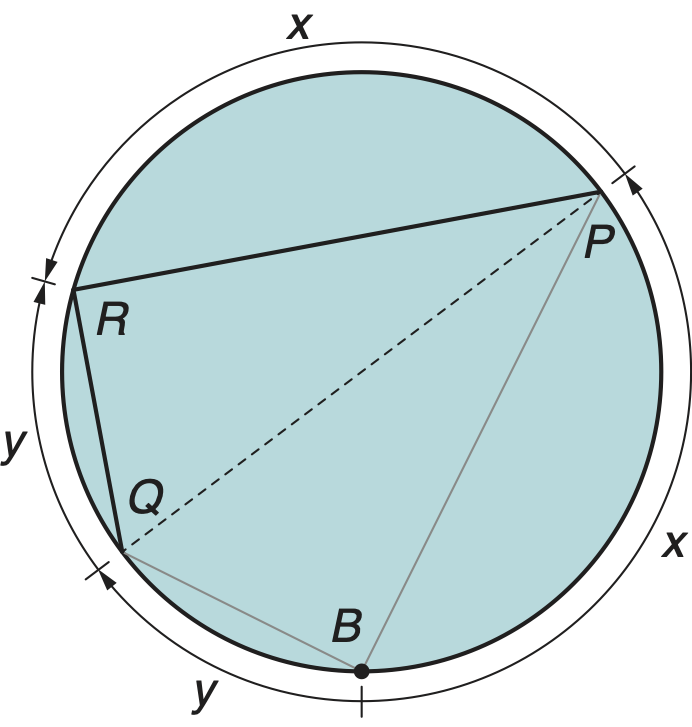
Reflecting the right triangle BPQ over the diameter produces the triangle PQR. It follows that arcs BPR and BQR have lengths 2x and 2y, respectively. Thus, we should fold along PR and QR. This is true for any diameter.
The figure below shows the procedure for performing these folds. First, lightly fold the circle in half, being careful not to crease the diameter. The half circle containing the base point should be on the bottom. Align the edge of a ruler from the base point to one end of the diameter, again being careful not to crease the diameter. Fold up the top layer of the circle using the ruler as a guide. You can remove the ruler once the fold is visible to make a sharp crease. We can fold the other line by running the ruler from the base point to the other end of the diameter.
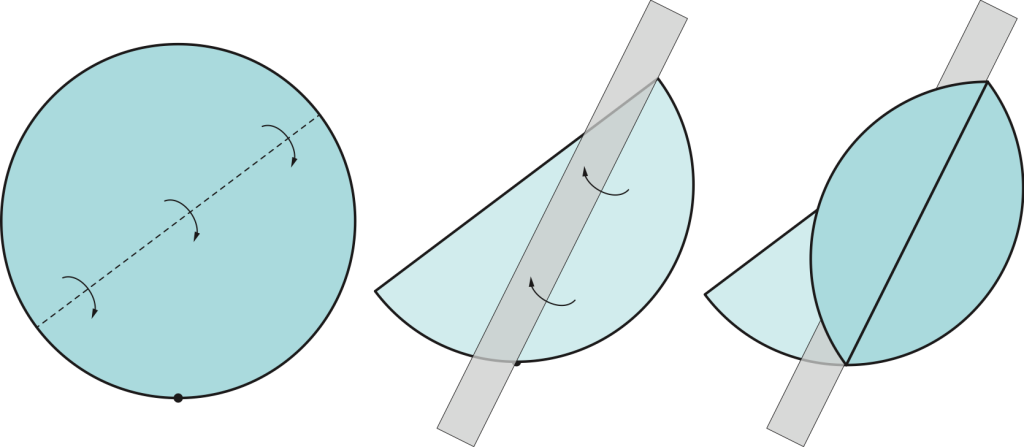
Once you understand this basic fold, repeat the procedure many times with various diameters. The form of the cardioid will slowly emerge.
We found that the best technique is to start with a diameter that ends near the base point. Then repeat, choosing slightly different diameters. This is shown in the figure below. Repeat this procedure, going in the other direction.
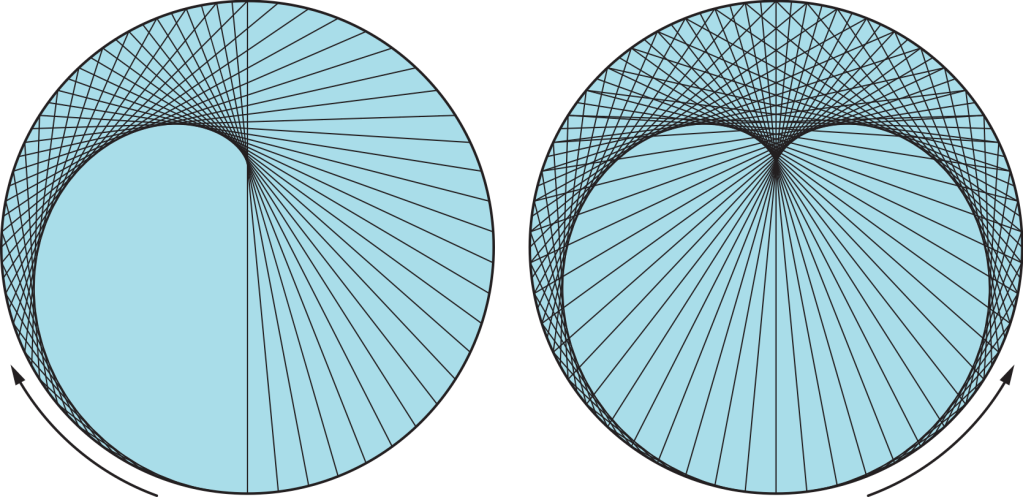
Notice that although the figure above shows all the fold lines, the ones that end near the base point (the ones that are nearly vertical in this figure) are harder to fold. But since they are less important to the cardioid design, they can be omitted.